If you’ve ever wondered why shower screen installers are so fussy with measurements, especially when it comes to frameless shower screens, it’s because bathrooms rarely behave like perfect rectangles. Walls bow. Floors fall to the waste. Tiles build up thickness. Corners aren’t 90 degrees. And a few millimetres “close enough” can turn into a door that swings by itself, a gap that won’t seal, or a screen that can’t be fitted without compromise.
On the Central Coast, a lot of bathrooms are in homes that have settled over time or have been renovated in stages. That can mean subtle movement, older wall framing that isn’t perfectly straight, and mixed surfaces where one wall has new tile and another is an older substrate. All of that matters when you’re trying to fit glass precisely.
This guide explains how accurate measuring supports a clean installation, what commonly throws measurements off, and what you can do as a homeowner to prepare before a professional measures and fits.
Why measuring is different for shower screens
Shower screen measuring isn’t just “width and height”. A screen needs to sit square, seal reliably, and operate smoothly every day. The measurements determine:
• Whether glass can be made to fit the space without forcing it
• Where hardware can safely be fixed (and whether the wall can support it)
• How seals will sit against tile lines and junctions
• Whether doors will clear vanities, towel rails, niche walls, or toilets
• How water will behave on a floor with a fall (and whether the splash will escape)
Because the finished product is glass, there’s very little forgiveness. Unlike timber, you can’t plane it. Unlike plasterboard, you can’t “fudge it” with filler. If the numbers don’t reflect the real site conditions, something has to give later: looks, function, or safety.
Q: How many millimetres “matter” with shower screens?
In practice, small errors can become obvious fast. A few millimetres can change how a door aligns with a seal, whether a magnetic strip closes properly, and whether a panel looks visibly out of square next to grout lines. The tighter the look you want, the more accuracy matters.
The real goal: measuring the bathroom you have, not the one you wish you had
People often picture a shower recess as a perfect box. But the measuring job is really about capturing reality:
• Is each wall plumb (vertical), or leaning in/out?
• Is the floor level, or does it fall unevenly?
• Are the corners square (90°), or open/closed?
• Are tiles consistent, or is there lippage and variation?
• Are trims, niches, and returns exactly where plans show?
A professional measure will account for these conditions so the final screen is specified to suit the site.
The 3-point method: why you measure more than once
A common professional approach is to measure at multiple points, because walls and openings vary:
• Measure the width at the top
• Measure width at the middle
• Measure width at the bottom
You then note the smallest measurement (because glass must physically fit through the tightest point), and you also record the variation across the opening. That variation tells you whether you’re dealing with:
• A wall that bows
• A corner that isn’t square
• A floor edge that isn’t straight
• Tile build-up that changes from one end to the other
Q: Why not just take the biggest width and “make it fit”?
Because the glass can’t pass through the narrowest point without interference. If the opening narrows at the bottom, a panel made to the top width may not sit down into position. You also risk forcing glass into a twist, which is never where you want to be.
What throws measurements off (the big ones)
Here are the most common site factors that make shower screen measuring tricky, especially in real-world renovations.
1) Walls that aren’t plumb
If a wall leans, a perfectly rectangular glass panel can end up with an uneven gap down the edge, or seals that don’t sit evenly. Even when that gap is “sealed”, the visual line can look off next to tile grout lines.
Signs this may be an issue:
• You can see grout lines drifting wider/narrower as they go up
• You place a spirit level on the wall and it shows a lean
• The shower opening looks slightly wider at one end than the other
2) Corners that aren’t square
A shower recess might look square, but if the corner is even slightly open or closed, it changes how panels meet and how doors align. This often shows up when:
• One wall has been re-sheeted
• A nib wall was altered
• Tiles were set out from an existing out-of-square corner
3) Floor fall and uneven levels
Bathroom floors should fall to the waste, but that fall isn’t always even. If a floor pitches more on one side, the bottom of the screen may sit differently across the length, which affects:
• How do door sweeps contact the floor
• Whether splash escapes at the low point
• Whether the baseline looks visually straight
4) Tile thickness, trims, and build-ups
Tiles and finishes change the “true” measuring face. Common culprits include:
• Different tile thicknesses on different walls
• Feature strips or decorative trims that stand proud
• Mitred edges vs aluminium trims
• Built-up waterproofing and adhesive thickness in corners
Even small build-ups can shift where a channel or hinge lands.
5) Silicone and grout lines that aren’t final
If you measure before final sealing and finishing, the surface you’re measuring to may change. That can matter more than people expect, especially around:
• Internal corner lines
• The junction at the shower base or floor tile edge
• Areas where a bead will be cleaned up and tightened later
6) The wrong timing in a renovation sequence
Measuring too early is one of the biggest causes of “it doesn’t fit”.
Best practice in most renos:
• Waterproofing is complete and cured
• Tiling is complete
• Grouting is complete
• Final fixtures that affect clearances are in (or at least confirmed)
If you measure before tiling, your final surfaces can shift by the tile + adhesive thickness, and by the tile set-out.
Q: Should a shower screen be measured before or after tiling?
In most cases, the most reliable measurement happens after tiling, because you’re measuring to the finished surface the glass and seals must meet. If you’re mid-renovation, the key is to measure at the stage where the final surfaces and junctions won’t change.
Door type changes the measuring job
A fixed panel is relatively straightforward compared to a door. Once you introduce movement, you introduce clearances and alignment.
Hinged doors: clearance and swing
For a hinged door, you need to consider:
• Door swing path (will it hit a vanity, towel rail, or wall?)
• Handle clearance and comfortable access
• Whether the hinge side wall is suitable for fixings
• How the door will hang if the wall is out of plumb
A tiny mis-measure can show up as a door that self-swings open or closed, or that doesn’t align neatly with a closing seal.
Sliding doors: overlap and run
Sliding setups depend on:
• Adequate opening width for overlap
• Track alignment (if applicable)
• A straight, consistent line so rollers run smoothly
• Clearances so doors don’t bind
If walls taper, you can end up with a slide that tightens at one end.
A practical homeowner measuring worksheet (what to record)
Even if you’re not doing the final measure yourself, having a worksheet helps you understand what matters, communicate clearly during a renovation, and spot potential issues early.
Measure in millimetres, and record:
• Opening width at top/middle/bottom
• Opening height at left/centre/right (if height is relevant to your layout)
• Any visible taper (how much the opening changes from top to bottom)
• Notes on plumb (does a level show a lean on either wall?)
• Notes on floor fall (is one side noticeably lower?)
• Location of obstructions: taps, mixers, niches, towel rails, window frames
• Door preference (hinged, sliding, walk-in) and swing direction if hinged
• The finished surface type (tile, microcement, acrylic, etc.)
If anything varies noticeably, that’s a signal the final measure should be handled carefully on-site.
Installation day problems that start as measurement problems
When measurements don’t match the real bathroom, these are the common symptoms:
• A panel can’t be manoeuvred into place without forcing it
• Gaps appear that are too large for seals to handle neatly
• Door alignment is off (magnets don’t meet, seals don’t sit flat)
• Hardware lands on a weak section of the wall or too close to an edge
• The bottom sweep doesn’t meet the floor consistently
• Water escapes at a “low point” that wasn’t accounted for
The aim of good measuring is not just “it fits”, but “it fits, seals, and operates properly for years”.
What to check before the professional measure
If you’re organising a renovation or replacement on the Central Coast, you can make measuring more straightforward by confirming these basics:
• Tiling is complete, and all edges are finished
• Grout is done and cleaned
• The shower base/floor junction is final
• Fixtures that affect clearance (vanity, toilet position, towel rails) are installed or locked in
• Waterproofing details are correct for wet areas (for general guidance on wet area waterproofing standards in Australia, see the Housing Industry Association overview of AS 3740 waterproofing of wet areas)
If something still needs to change, it’s usually better to delay measuring than to risk remaking glass.
Central Coast scenarios that commonly affect measuring
Every region has its “usual suspects”. Around the Central Coast, a few common situations can add complexity:
Older bathrooms with subtle settlement
Over time, homes can shift slightly. It might not be dramatic, but it can show up as:
• Walls leaning a few millimetres over the height of the shower
• Floors that have an uneven fall
• Corners that aren’t perfectly square
Those are exactly the kinds of small changes that matter with glass.
Renovations where only part of the bathroom is updated
If one wall is newly tiled and another is older, you can get mixed thickness and alignment. Measuring has to account for the finished face where the screen will actually sit.
Tight bathrooms where door clearance is limited
Many bathrooms prioritise layout over door swing clearance. Measuring needs to consider how the door will behave in daily use, not just whether the glass technically fits.
When to pause and get advice (before measuring goes further)
Even in an informational guide, it’s worth being clear: accurate measuring doesn’t fix underlying bathroom problems. If you notice any of the below, sort them first:
• Loose or hollow-sounding tiles near where fixings will go
• Soft flooring, movement, or cracks around the base
• Signs of water damage outside the shower area
• Persistent mould or damp smell that returns quickly after cleaning
• Major wall bowing that’s visible to the naked eye
These issues can affect not only measuring, but long-term performance.
How this connects to frameless screen success
Whether you’re planning a new bathroom or replacing an old screen, the “secret” is that the best-looking outcomes are usually the ones where measuring was done on a finished, stable surface, and where door function and sealing were thought through in advance.
If you’re comparing options or planning the next steps, Intrinsic Glass’ page on frameless shower screens is a helpful reference point for understanding how glass layouts and hardware choices come together.
And if you’re mid-renovation, you’ll usually get a smoother process by locking in key clearance decisions early (hinged vs sliding, swing direction, obstructions) before anyone tries to finalise sizes.
If you want a deeper walkthrough of what to record and how to think about on-site variables, keep this guide handy as your shower screen measuring guide while you plan the sequence and finishing details.
FAQ: Measuring and installation questions homeowners ask
Q: What’s the most common measuring mistake homeowners make?
Measuring only once, at one height, and assuming the opening is consistent. In real bathrooms, measuring top/middle/bottom reveals the true shape of the space.
Q: Do I measure to the tile face or behind the tile?
Usually to the finished surface the screen will seal against (typically the tile face). Measuring to anything that will later be covered or built out can lead to a mismatch.
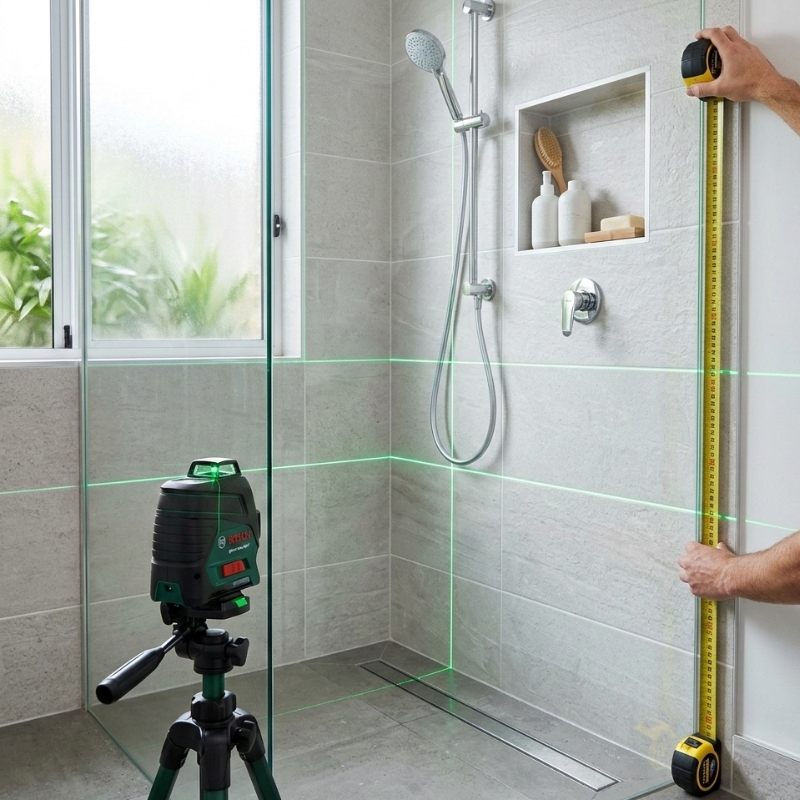
Q: Can I measure with a tape measure, or do I need a laser?
A tape measure can work for rough planning, but accurate site measuring benefits from tools that help confirm plumb and level (and reduce reading errors). The bigger issue is not the tool, but capturing multiple points and recording site conditions.
Q: Why does the smallest measurement matter?
Because the glass must fit through the tightest point without being forced. The smallest measurement also signals how much variation exists and whether additional allowances or solutions are needed.
Q: What if my walls are noticeably out of plumb?
It’s common. The key is to measure and note it so the final specification accounts for it, rather than trying to “make a rectangle fit” a non-rectangular space.
Q: Should I install towel rails or shelves before measuring?
If they affect door swing or panel placement, it’s best they’re installed or their exact position is final before measuring. Small changes to fixtures can create clearance issues that only show up late.